


Table of contents
- INTRODUCTION
- NESTJSX PRESENTATION
- HOW TO CONFIGURE IT PROPERLY
- LET'S GO 🚀
- ℹ️🔵 STEP 1 : INSTALL NESTJS & CREATE PROJECT
- ℹ️🔵 STEP 2 : DOTENV
- ℹ️🔵 STEP 3 : DATABASE TOOLING
- ℹ️🔵 STEP 4 : DATABASE CREATION & DESIGN
- ℹ️🔵 STEP 5 : SMART-API TOOLING
- ℹ️🔵 STEP 6 : CREATE THE RESSOURCES
- ℹ️🔵 STEP 7 : CONFIGURE THE RESSOURCES
- A. Configure Resource Entity
- B. Configure Resource Module
- C. Configure Resource Controller
- D. Configure Resource Service
- E. Cleaning 🧽🧹
- ℹ️🔵 STEP 8 : APP BOOTSTRAP CONFIGURATION
- 1. Configure CORS options
- ℹ️🔵 STEP 9 : TEST RUN AND DEPLOY 🚀
- Thank y'all for your Time ! 🤗
INTRODUCTION
You're probably wondering what the hell a Smart API is. 🤔
😂 I understand you too but the question to ask is what are we going to build? To solve what problem?
Quite often, the problem with our REST APIs is: How to easily query or manipulate all this data without having to write all the Handlers in my Controllers and all the methods in my services?
GraphQL maybe? 🤔
Also in this case (GraphQL) how to provide all possible questions or filters without writing all resolvers?
😂 Yes I am very very LAZY as any developer should be 😂 I am ALWAYS looking for shortcuts.
Basically I want to have a REST API but that behaves like GraphQL i.e. in the GET requests I could filter on the fly the data I was going to retrieve from the database. So the GET request will indirectly build the SQL request.
Why?! Because when you put it like that it sounds strange but the impact is huge in the system if directly in front I am able to ask questions like:
What are the active users whose log starts with F, who are between 30 and 40 years old and are of Senegalese nationality?
...And don't have to anticipate this in the backend with methods in Controllers and Services, I would have an incredibly flexible and lightweight system.
What about all those CRUDs to do for hundreds of tables and an array of databases?
I had to find a way to automate this and solve this redundancy problem from the start.
That's when, in the middle of all this chaos, after days and days of searching, I don't know how, I find a microframework for NestJS called "@nestjsx/crud".
🚨🚨 BIG WARNING The library
@nestjsx/crudis no longer under active maintenance; however,@dataui/crudserves as its maintained fork. Therefore, all commands previously associated with@nestjsx/crudshould be reviewed and replaced with their equivalents in@dataui/crud.
NESTJSX PRESENTATION
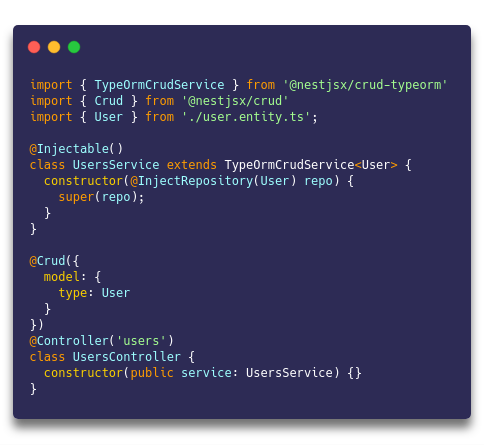
We believe that everyone who's working with NestJs and building some RESTful services and especially some CRUD functionality will find @dataui/crud microframework very useful.
Features
🔌 Super easy to install and start using the full-featured controllers and services :point_right:
🐙 DB and service agnostic extendable CRUD controllers
🔎 Reach query parsing with filtering, pagination, sorting, relations, nested relations, cache, etc.
🔭 Framework agnostic package with query builder for a frontend usage
👾 Query, path params and DTOs validation included
🎬 Overriding controller methods with ease
🔧 Tiny config (including globally)
🎁 Additional helper decorators
✏️ Swagger documentation
Packages
@dataui/crud - core package which provides
@Crud()decorator for endpoints generation, global configuration, validation, helper decorators (docs)@dataui/crud-request - request builder/parser package which provides
RequestQueryBuilderclass for a frontend usage andRequestQueryParserthat is being used internally for handling and validating query/path params on a backend side (docs)@dataui/crud-typeorm - TypeORM package which provides base
TypeOrmCrudServicewith methods for CRUD database operations (docs)
Documentation
HOW TO CONFIGURE IT PROPERLY
LET'S GO 🚀
ℹ️🔵 STEP 1 : INSTALL NESTJS & CREATE PROJECT
npm i -g @nestjs/cli

nest new project-name
ℹ️🔵 STEP 2 : DOTENV
- In our
app.module.ts, we need to import thetypeOrmModule, but before that, we have to set up our dotenv file, to do so install the following in your terminal.
npm install @nestjs/config --save
- In the project’s directory add a .env file and add database variables in this format. Make sure the variables conforms to your settings in pgAdmin. This is where you use the password you set in pgAdmin.
DB_HOST='localhost'
DB_PORT=5432
DB_USERNAME='nouroula'
DB_PASSWORD='nampeyi@22'
DB_NAME='madeingalsendb'
- Then add ConfigModule to your app.module.ts imports, don’t forget to import it.
import { Module } from '@nestjs/common';
import { UsersModule } from './users/users.module';
import { ConfigModule } from '@nestjs/config';

@Module({
    imports: [
        ConfigModule.forRoot({ isGlobal: true }),
    ],
    controllers: [],
    providers: [],
})

export class AppModule {}
ConfigModule.forRoot() will load and parse your .env file. The setting isGlobal: true will automatically import ConfigModule to all other modules, which means you do not need to import it in Users.module.ts file. Instead of using process.env.variableName, we’ll be using
configService.get(‘VariableName’)
ℹ️🔵 STEP 3 : DATABASE TOOLING
- Let’s add
TypeORMsupport to our project by using the pre-build NestJS-to-TypeORM module and PostGres Driver.
npm install --save @nestjs/typeorm typeorm pg
- I am a Big Fan of the Database-First Approach so i will use an amazing tool for TypeORM Entity Model generation using DB defined table. Doc
npm i typeorm-model-generator --save-dev
- Add Database Connection to the AppModule :
import { Module } from '@nestjs/common';
import { ConfigModule, ConfigService } from '@nestjs/config';
import {TypeOrmModule} from '@nestjs/typeorm';

@Module({
  imports: [
    ConfigModule.forRoot({ isGlobal: true }),
    TypeOrmModule.forRootAsync({
      imports: [ConfigModule],
      useFactory: (configService: ConfigService) =({
        name: "madeingalsendb", // Connection Name (Optional)
        type: 'postgres',
        host: configService.get('DB_HOST'),
        port: +configService.get<number>('DB_PORT'),
        username: configService.get('DB_USERNAME'),
        password: configService.get('DB_PASSWORD'),
        database: configService.get('DB_NAME'),
        entities: ["dist/**/*.entity{.ts,.js}"],
        autoLoadEntities: true, // true = find & load all entities in the project
        synchronize: false, // Don't Migrate & Overwrite the Database
        // logging: ["info", "error"], // boolean | "all" | ("query" | "schema" | "error" | "warn" | "info" | "log" | "migration")[]
      }),
      inject: [ConfigService],
    }),
   ],
  controllers: [],
  providers: [],
})

export class AppModule {}
ℹ️🔵 STEP 4 : DATABASE CREATION & DESIGN
We use pre-built PostgreSQL docker image and run the database sever as a docker process. Like this we can script a whole setup with a couple lines of shell code to get our server instance running and prepare an empty database ready to connect to.
You can now create your database tables and define everything you need. you can use PgAdmin for that.
- SHELL SCRIPT EXEMPLE FOR WSL AND LINUX USERS :
#!/bin/bash
set -e

SERVER="madeingalsendb";
PW="nampeyi@22";
DB="madeingalsendb";

echo "echo stop & remove old docker [$SERVER] and starting new fresh instance of [$SERVER]"
(docker kill $SERVER || :) && \
  (docker rm $SERVER || :) && \
  docker run --name $SERVER -e POSTGRES_PASSWORD=$PW \
  -e PGPASSWORD=$PW \
  -v ${PWD}/postgres-docker:/var/lib/postgresql/data \
  -p 5432:5432 \
  -d postgres

# wait for pg to start
echo "sleep wait for pg-server [$SERVER] to start";
SLEEP 3;

# create the db
echo "CREATE DATABASE $DB ENCODING 'UTF-8';" | docker exec -i $SERVER psql -U postgres
echo "\l" | docker exec -i $SERVER psql -U postgres
- For the purpose of this demo we are going to use these following entities :
/*=====================================================*/
/* ---FOR THE USERS <---*/
/*=====================================================*/
CREATE TABLE public.mig_users
(
    uuid uuid NOT NULL DEFAULT uuid_generate_v1(),
    firstname character varying(100) NOT NULL,
    lastname character varying(50) NOT NULL,
    github_profile_url character varying(255) NOT NULL,
    address character varying(255),
    description character varying(255),
    username character varying(100) NOT NULL,
    state character varying(50),
    is_active boolean NOT NULL DEFAULT true,
    PRIMARY KEY (uuid)
);

ALTER TABLE IF EXISTS public.mig_users
    OWNER to nouroula;

COMMENT ON TABLE public.mig_users
    IS 'Table des Utilisateurs de Made in Galsen';


/*=====================================================*/
/* ---FOR THE PROJECTS <---*/
/*=====================================================*/
CREATE TABLE public.mig_projects
(
    id serial NOT NULL,
    owner uuid NOT NULL,
    name character varying(100) NOT NULL,
    description character varying(255) NOT NULL,
    repo_url character varying(255) NOT NULL,
    is_archived boolean NOT NULL DEFAULT false,
    show boolean NOT NULL DEFAULT true,
    is_private boolean NOT NULL DEFAULT false,
    PRIMARY KEY (id)
);

ALTER TABLE IF EXISTS public.mig_projects
    OWNER to nouroula;

COMMENT ON TABLE public.mig_projects
    IS 'Table des Projets de Made In Galsen';
ℹ️🔵 STEP 5 : SMART-API TOOLING
- Now are going to install all the dependencies for our 'Smart-Api' tooling.
npm install --save @nestjs/swagger swagger-ui-express
npm i --save @dataui/crud-typeorm
npm i --save @dataui/crud class-transformer class-validator
- Then, pull the DB Tables definition to your project with
typeorm-model-generator:
npx typeorm-model-generator -h localhost -p 49155 -d madeingalsendb -u nouroula -x nampeyi@22 -e postgres -o ./myDb_entities
After this command you'll find your entities in the myDb_entities folder.
🤗 You can also create a shortcut to this command in your package.json file but your DbPassword will be visible to anyone.
ℹ️🔵 STEP 6 : CREATE THE RESSOURCES
Let's imagine a real-world scenario, where we need to expose CRUD endpoints for 2 entities, let's say User and Product entities. Following the best practices, for each entity we would have to perform several operations, as follows:
Generate a module (
nest g mo) to keep code organized and establish clear boundaries (grouping related components)Generate a controller (
nest g co) to define CRUD routes (or queries/mutations for GraphQL applications)Generate a service (
nest g s) to implement & isolate business logicGenerate an entity class/interface to represent the resource data shape
Generate Data Transfer Objects (or inputs for GraphQL applications) to define how the data will be sent over the network
That's a lot of steps!
To help speed up this repetitive process, Nest CLI provides a generator (schematic) that automatically generates all the boilerplate code to help us avoid doing all of this, and make the developer experience much simpler.
Generating a new resource To create a new resource, simply run the following command in the root directory of your project:
nest g resource [name]
- In our demo we'll do :
nest g resource app/users

nest g resource app/projects
ℹ️🔵 STEP 7 : CONFIGURE THE RESSOURCES
A. Configure Resource Entity
- First, You need to replace generated resource entity with the one generated by
typeorm-model-generatorbut its depending on you if you will change the class name on my part i keep my generated entity classname. Example :
import { Column, Entity, Index, PrimaryGeneratedColumn } from "typeorm";

@Index("mig_projects_pkey", ["id"], { unique: true })
@Entity("mig_projects", { schema: "public" })
export class Project { // For the Project ClassName you can choose whatever you want
  @PrimaryGeneratedColumn({ type: "integer", name: "id" })
  id: number;

  @Column("uuid", { name: "owner" })
  owner: string;

  @Column("character varying", { name: "name", length: 100 })
  name: string;

  @Column("character varying", { name: "description", length: 255 })
  description: string;

  @Column("character varying", { name: "repo_url", length: 255 })
  repoUrl: string;

  @Column("boolean", { name: "is_archived", default: () ="false" })
  isArchived: boolean;

  @Column("boolean", { name: "show", default: () ="true" })
  show: boolean;

  @Column("boolean", { name: "is_private", default: () ="false" })
  isPrivate: boolean;
}
- Second, you need to add the Swagger Definition Decorator on top of the
@Columndecorators :
import { ApiProperty } from "@dataui/crud/lib/crud";
import { Column, Entity, Index, PrimaryGeneratedColumn } from "typeorm";

@Index("mig_projects_pkey", ["id"], { unique: true })
@Entity("mig_projects", { schema: "public" })
export class Project {
    @ApiProperty()
    @PrimaryGeneratedColumn({ type: "integer", name: "id" })
    id: number;

    @ApiProperty()
    @Column("uuid", { name: "owner" })
    owner: string;

    @ApiProperty()
    @Column("character varying", { name: "name", length: 100 })
    name: string;

    @ApiProperty()
    @Column("character varying", { name: "description", length: 255 })
    description: string;

    @ApiProperty()
    @Column("character varying", { name: "repo_url", length: 255 })
    repoUrl: string;

    @ApiProperty()
    @Column("boolean", { name: "is_archived", default: () ="false" })
    isArchived: boolean;

    @ApiProperty()
    @Column("boolean", { name: "show", default: () ="true" })
    show: boolean;

    @ApiProperty()
    @Column("boolean", { name: "is_private", default: () ="false" })
    isPrivate: boolean;
}
B. Configure Resource Module
You need to add the forFeature() method to define which repositories are registered in the current scope.
import { Module } from '@nestjs/common';
import { UsersService } from './users.service';
import { UsersController } from './users.controller';
import { TypeOrmModule } from '@nestjs/typeorm';
import { User } from './entities/user.entity';


@Module({
  imports: [TypeOrmModule.forFeature([User])],
  controllers: [UsersController],
  providers: [UsersService],
})
export class UsersModule {}
C. Configure Resource Controller
1. App Variables
For a better scalability create a config folder inside the ./src and create a app.config.ts .
- Create an enumerator inside the file with the followings :
export enum ApiTagsList {
    USERS = '👥 USERS 👥 | 🛈 madeingalsendb • 🖧 nouroula',
    PROJECTS = '🧮 PROJECTS 📦 | 🛈 madeingalsendb • 🖧 nouroula',
}
2. Configure the Controller
Open the controller of the resources (users.controller.ts or projects.controller.ts) and configure it as follow :
import { Controller } from '@nestjs/common';
import { UsersService } from './users.service';
import { Crud, CrudController } from '@dataui/crud';
import { User } from './entities/user.entity';
import { ApiTags } from '@nestjs/swagger';
import { ApiTagsList } from 'src/config/app.config';

@ApiTags(ApiTagsList.USERS)
@Crud({
 model: {
   type: User,
 }
})
@Controller('users')
export class UsersController implements CrudController<User{
  constructor(public service : UsersService) {}

}
D. Configure Resource Service
Open the service of the resources (users.service.ts or projects.service.ts) and configure it as follow :
import { Injectable } from '@nestjs/common';
import { InjectRepository } from '@nestjs/typeorm';
import { TypeOrmCrudService } from '@dataui/crud-typeorm';
import { User } from './entities/user.entity';

@Injectable()
export class UsersService extends TypeOrmCrudService<User{
  // -------------------------------------
  constructor(@InjectRepository(User) repo) {
    super(repo);
  }
  // -------------------------------------
}
E. Cleaning 🧽🧹
1. DTOs
So with this configuration we don't need the dto folder and objects as we are using the Entity directly as model. You'll need to delete them in each resource.
2. App Module
Now for security reason youcan delete the app.controller.ts and app.service.ts files and removes them from the app.module or just modify them to display something else than a basic Hello World.
In our Demo i'll print a message.
ℹ️🔵 STEP 8 : APP BOOTSTRAP CONFIGURATION
1. Configure CORS options
Open the main.ts file and replace its content by the followings :
import { NestFactory } from '@nestjs/core';
import { DocumentBuilder, SwaggerCustomOptions, SwaggerModule } from '@nestjs/swagger';
import { AppModule } from './app.module';

async function bootstrap() {
    // ======== CORS SECURITY ========
    const corsOptions = {
      origin : [
        'http://localhost:4200',
        "http://madeingalsen.dev"
      ],
      methods: "GET,HEAD,PUT,PATCH,POST,DELETE,OPTIONS",
    }
    // ===============================
  /**
   * ==================================================
   * Nest  App Creation Using NestFactory Core.
   * @see -https://docs.nestjs.com/first-steps
   */
   const app = await NestFactory.create(AppModule);

   app.enableCors(corsOptions);

   app.setGlobalPrefix('api'); // Will make all routes start with '/api'

   // ==================================================

   /**
    * ============================================================
    * ⚙ Swagger Module Configuration for OpenAPI Documentation ⚙
    * ===========================================================
    */
   /* Swagger Customisation refer to : https://docs.nestjs.com/openapi/introduction */
    const customOptions: SwaggerCustomOptions = {
     swaggerOptions: {
       persistAuthorization: true,
     },
     customSiteTitle: '📡 MADE-IN-GALSEN OPEN API ⚙', // Documentation Website Title
     customfavIcon: 'https://www.madeinsenegal.dev/favicon.ico', // Documentation Website Favicon
   };

   const config = new DocumentBuilder()
     .setTitle('MADE-IN-GALSEN API GATEWAY')
     .setDescription('This is the API Description conforms to the OpenAPI Specification.')
     .setVersion('1.0')
    //  .addTag('DEMO', 'Built by Orbit Turner.')
     .build();
   const document = SwaggerModule.createDocument(app, config);
   SwaggerModule.setup('api', app, document, customOptions);
   // ==================================================


   /** Launching The Server at Port : 3000 */
   await app.listen(3000);
   // ==================================================
}
bootstrap();
ℹ️🔵 STEP 9 : TEST RUN AND DEPLOY 🚀
🚀 STEP 10 : QUERY YOUR API SMARTLY 🚀 🔵 To Use The Smart Query Filters go to Requests Documentation Page
Thank y'all for your Time ! 🤗
Demo Code Repository : github.com/orbitturner
My Portfolio : orbitturner.com
LinkedIn : linkedin.com/in/orbitturner
Twitter : twitter.com/orbitturner